ただし、始める前に、説明どおりにこのチュートリアルを実行したい場合は、次の画像をダウンロードしてください。
ステップ1
Photoshopで画像を開きます。白黒またはグレースケールである必要はありません。どのカラー画像でも機能します。

ステップ2
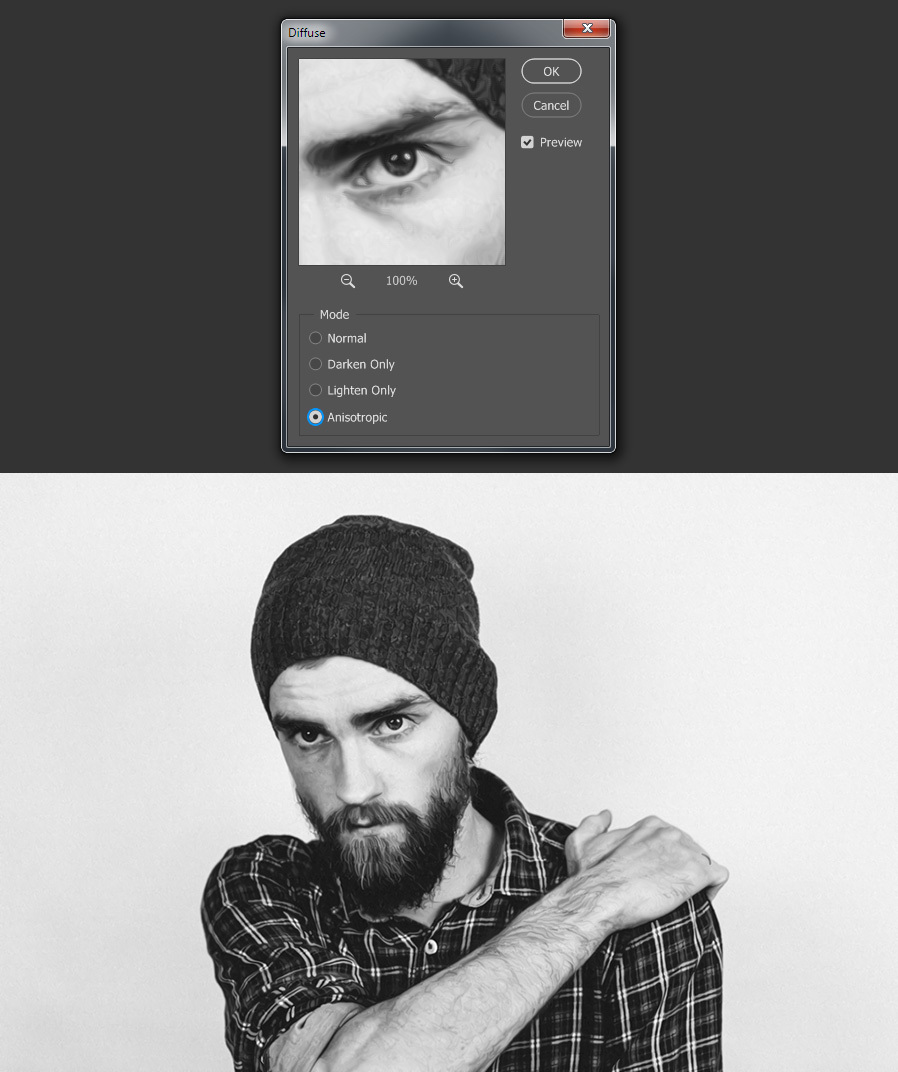
フィルターに移動> Stilyze >拡散。 [拡散]ウィンドウで[異方性モード]を選択し、[OK]をクリックします。

ステップ3
もう一度、フィルター> Stilyze >拡散に移動します。 [拡散]ウィンドウで[異方性モード]を選択し、[OK]をクリックします。
ステップ4
レイヤーに移動>レイヤーを複製します。このレイヤーに「ハイパス」という名前を付けて、[OK]をクリックします。

ステップ5
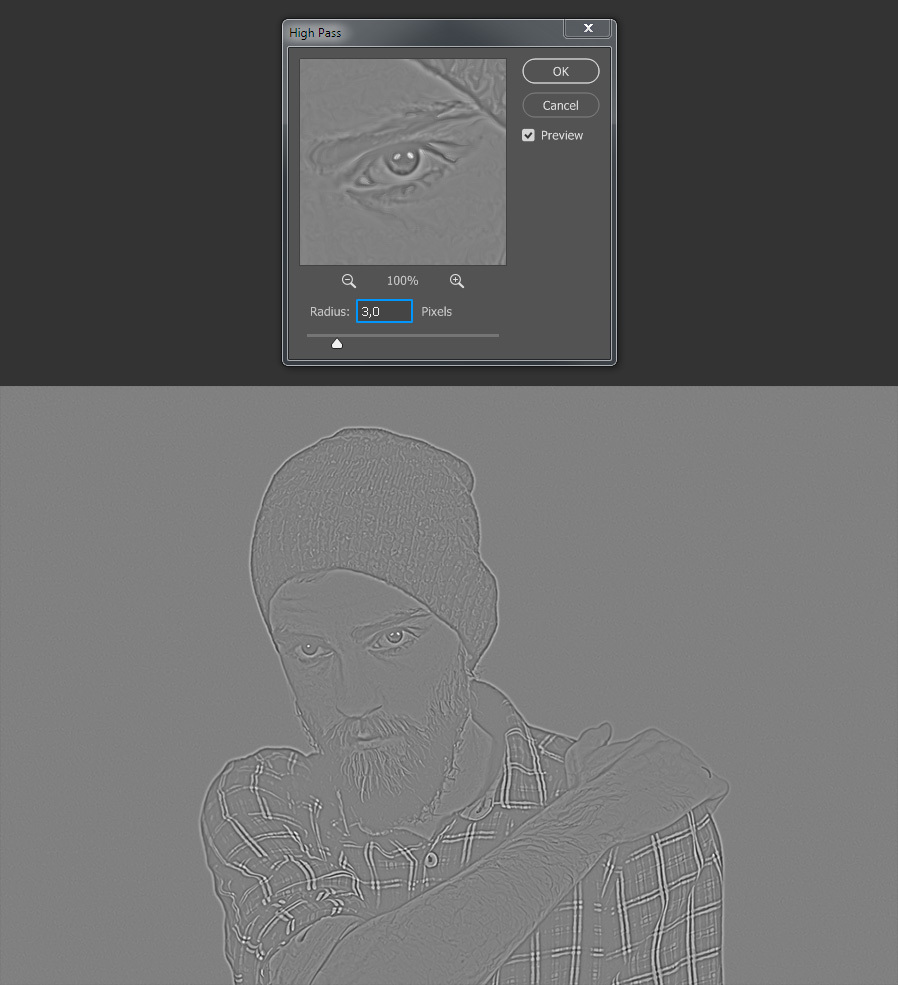
[ハイパス]レイヤーを選択した状態で、フィルター>その他の>に移動します。ハイパス。値を3に設定し、[OK]をクリックします。
ステップ6
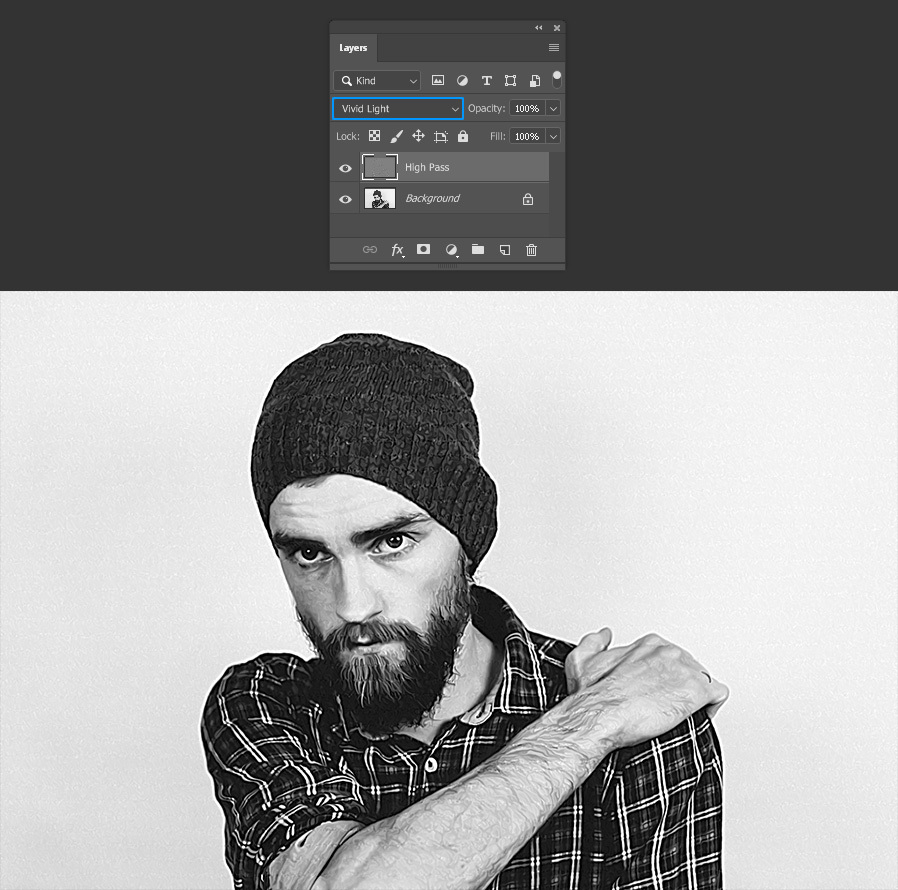
レイヤーパネルで、「ハイパス」レイヤーのブレンドモードをVividLightに設定します。
ステップ7
レイヤーに移動>新しい調整レイヤー>しきい値。このレイヤーに「しきい値」という名前を付けて、[OK]をクリックします。
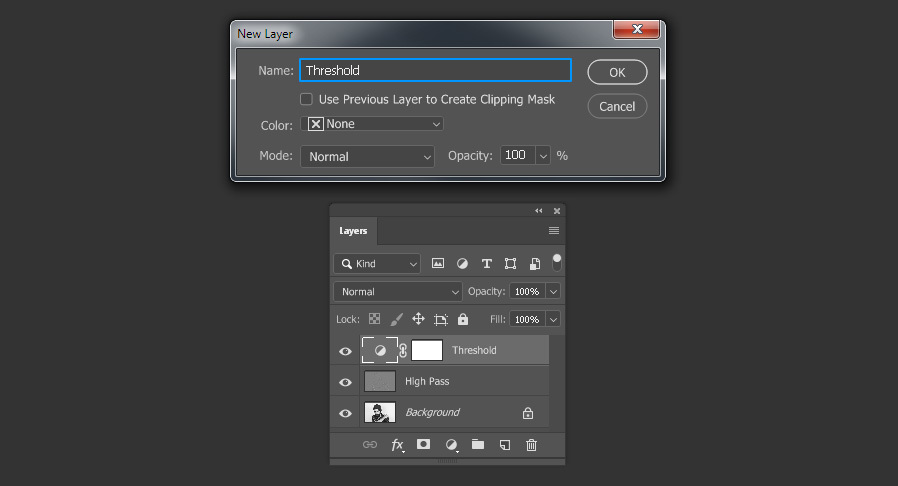
ステップ8
使用している画像に応じてしきい値レベルを調整します。この場合、値138で問題なく機能します。

ステップ9
しきい値の結果に満足したら、レイヤー>マージ表示に移動します。
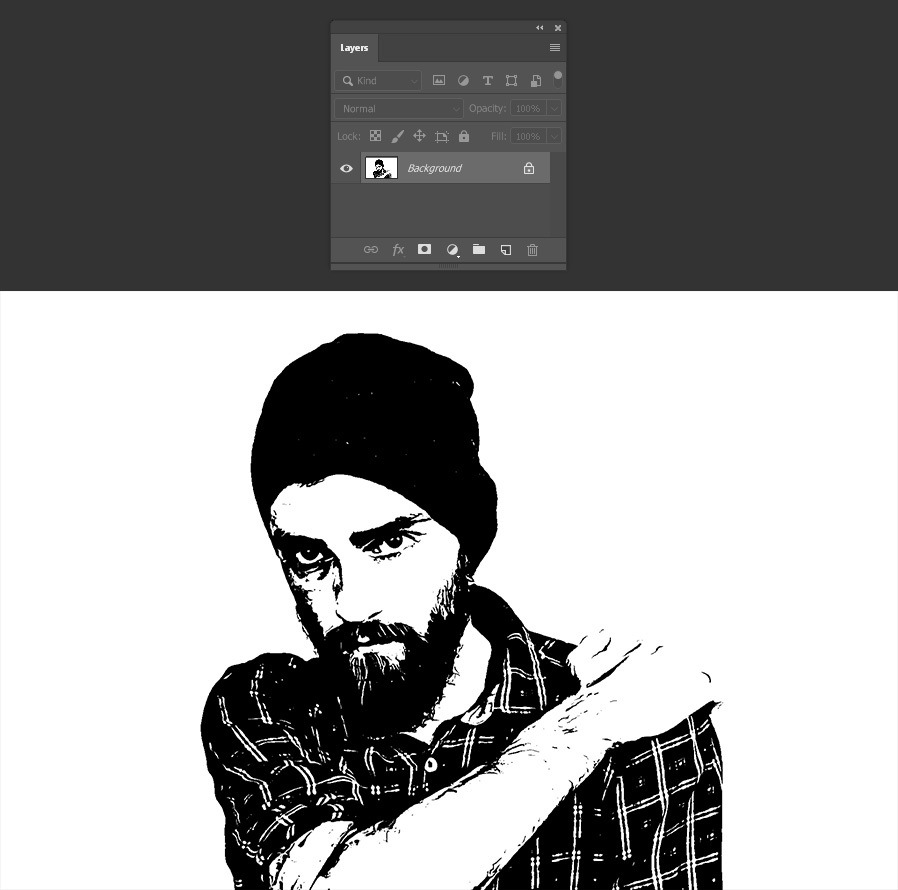
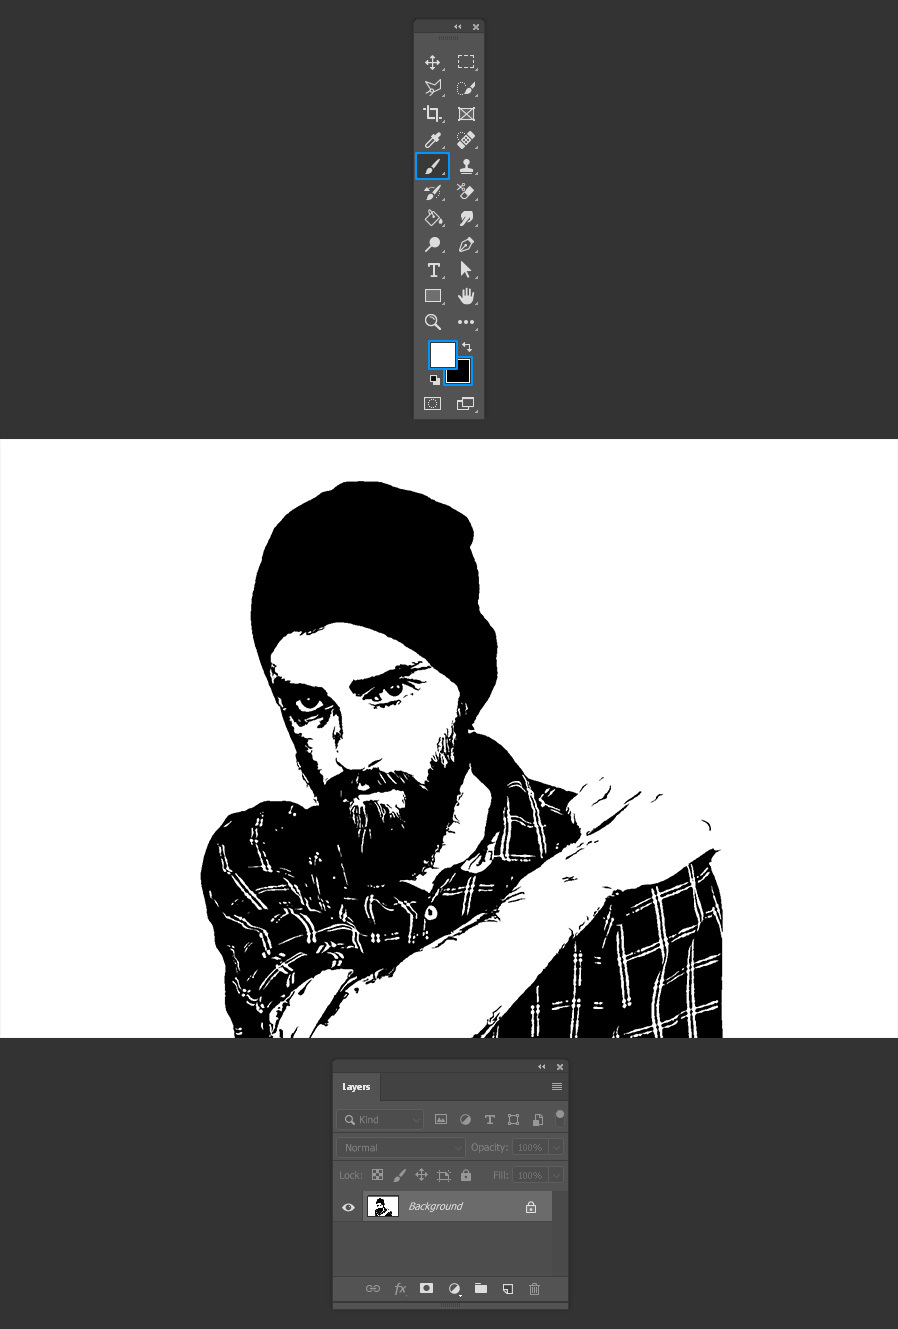
ステップ10
この時点で、すべてを削除できます黒と白の色のブラシツール(B)を使用した不要な詳細。
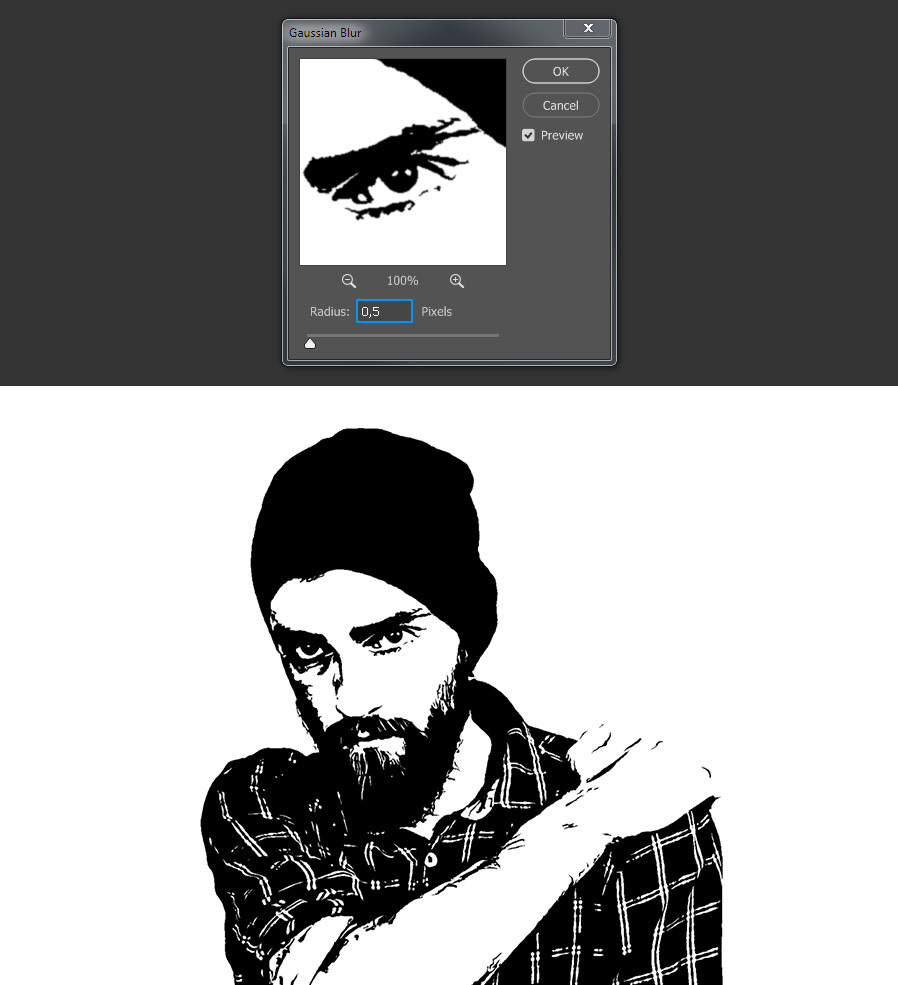
ステップ11
マージされたレイヤーを選択した状態で、フィルター>ぼかし>ガウスぼかし。 0.5ピクセルの値を設定し、[OK]をクリックします。
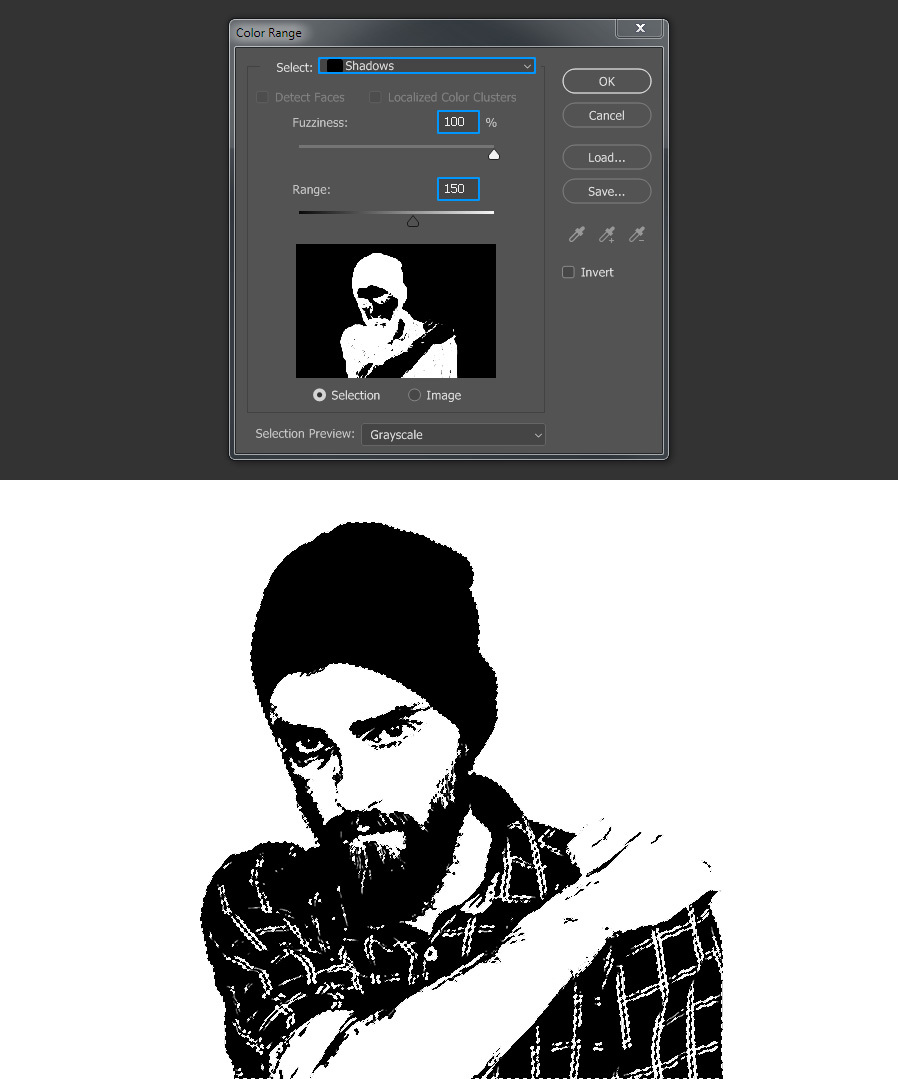
ステップ12
>の色範囲の選択に移動します。ドロップダウンメニューから[シャドウ]を選択し、ファジーと範囲を好みに合わせて調整します。この場合、ファジーを100%に設定し、範囲を150に設定します。選択に問題がなければ、[OK]をクリックします。
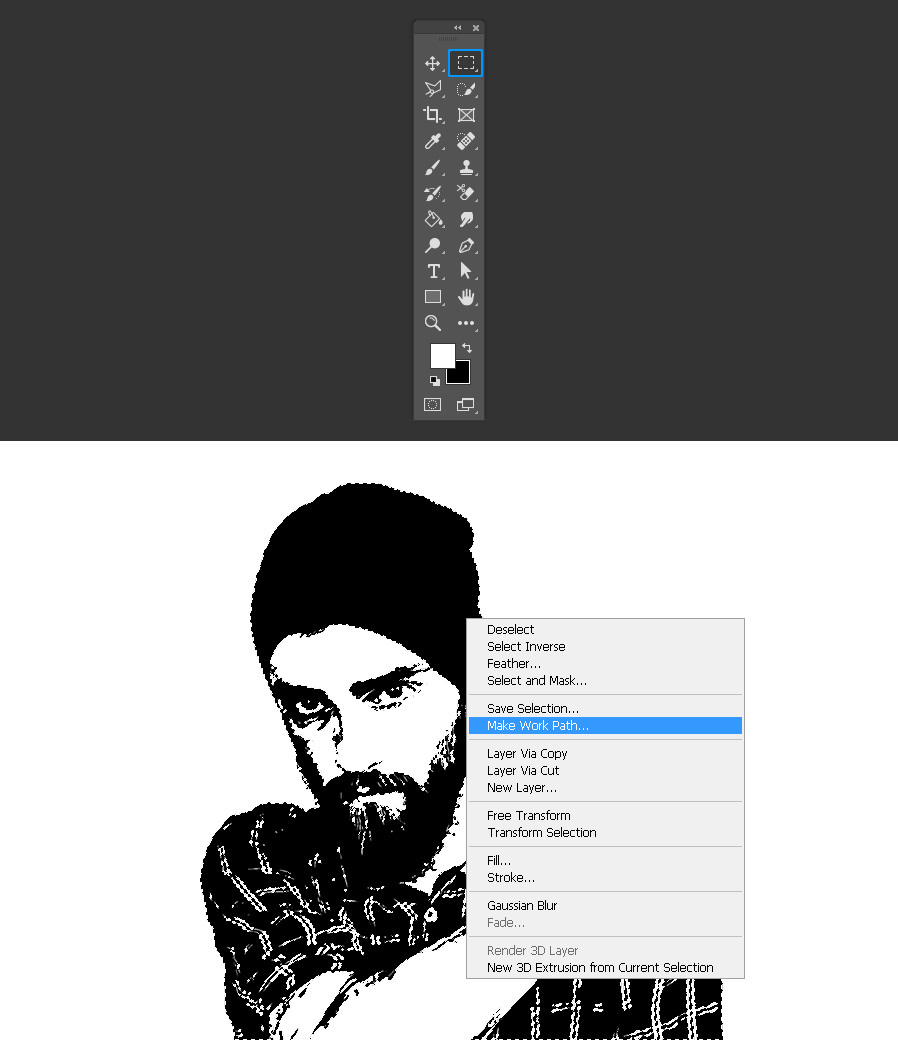
ステップ13
選択アクティブな場合は、長方形マーキーツール(M)を選択し、選択範囲を右クリックします。ドロップダウンメニューから[作業パスの作成]を選択します。
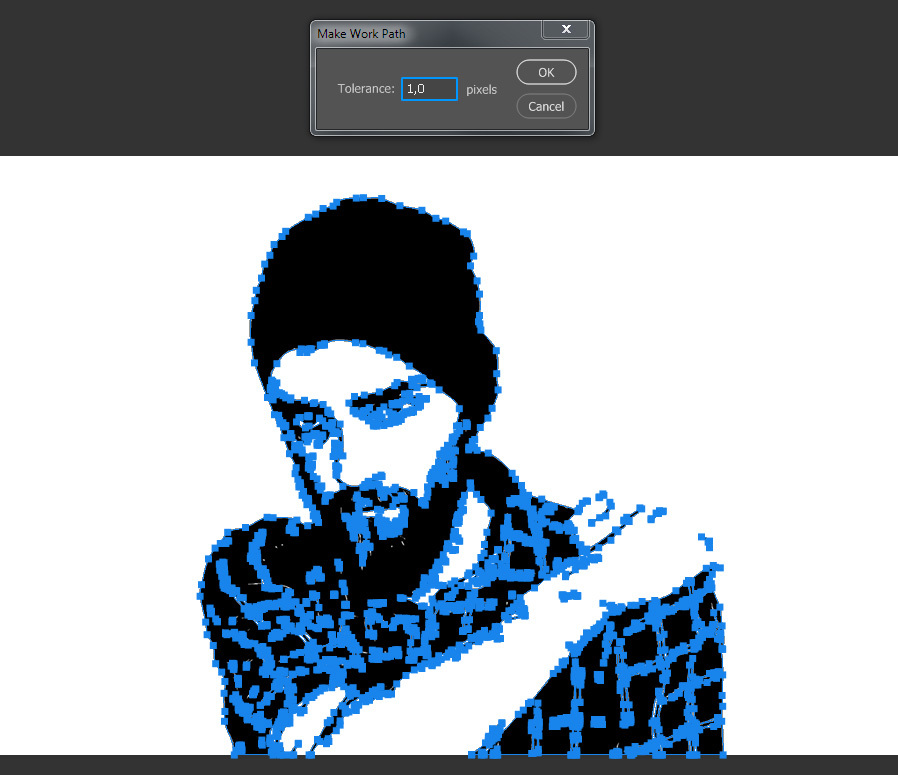
ステップ14
[作業パスの作成]ウィンドウで、許容値を1または1.5ピクセルに設定し、[OK]をクリックします。 。
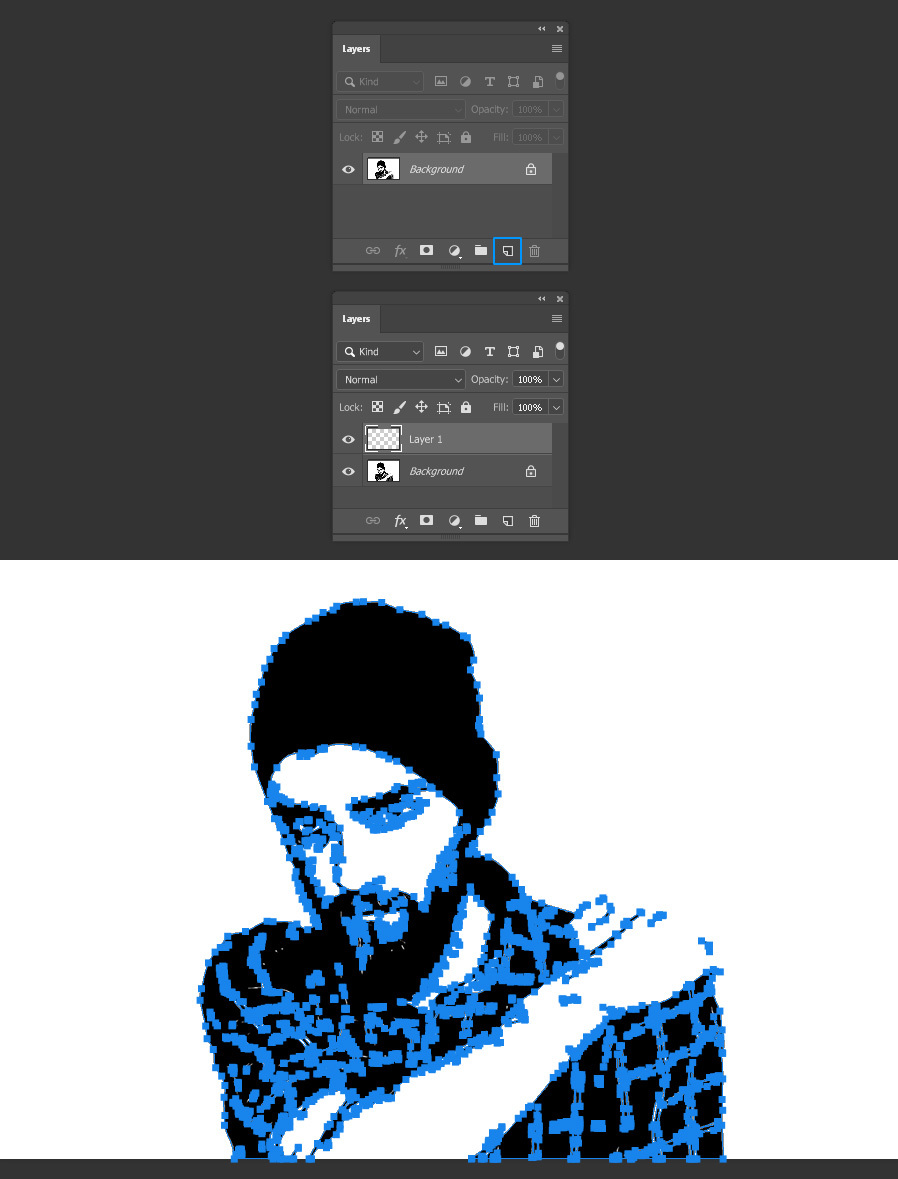
ステップ15
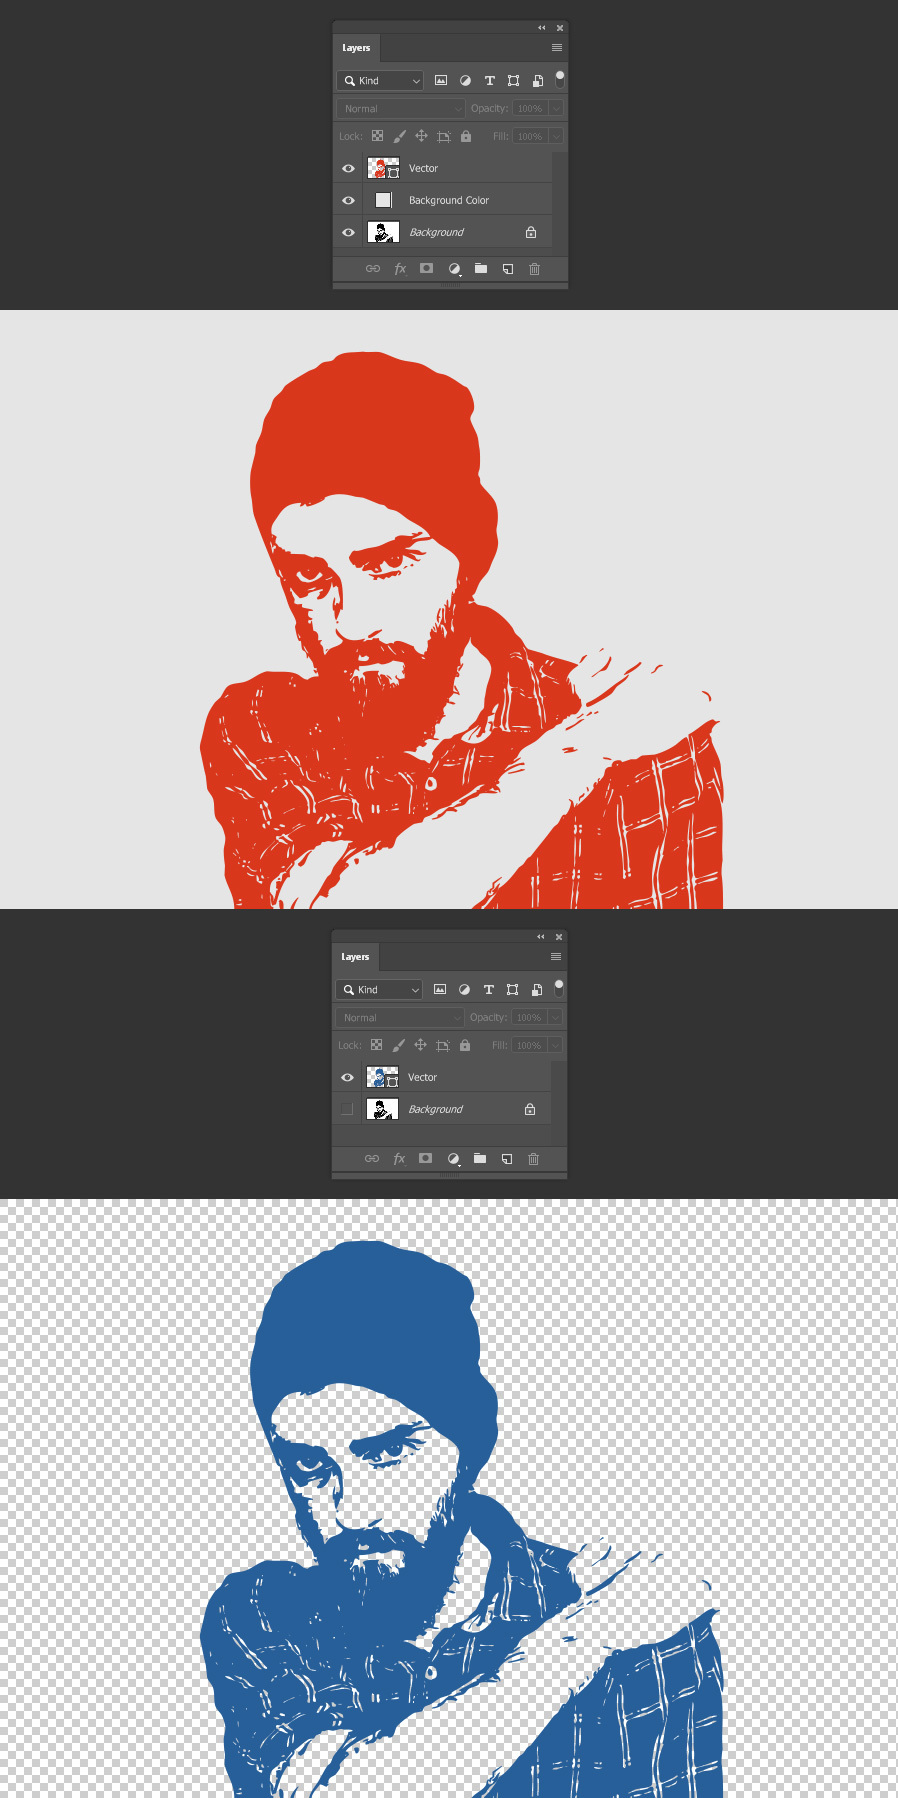
レイヤーパネルで、[新しいレイヤーを作成]アイコンをクリックします。
ステップ16
レイヤーに移動>新しい塗りつぶしレイヤー>単色。このレイヤーに「Vector」という名前を付けて、[OK]をクリックします。

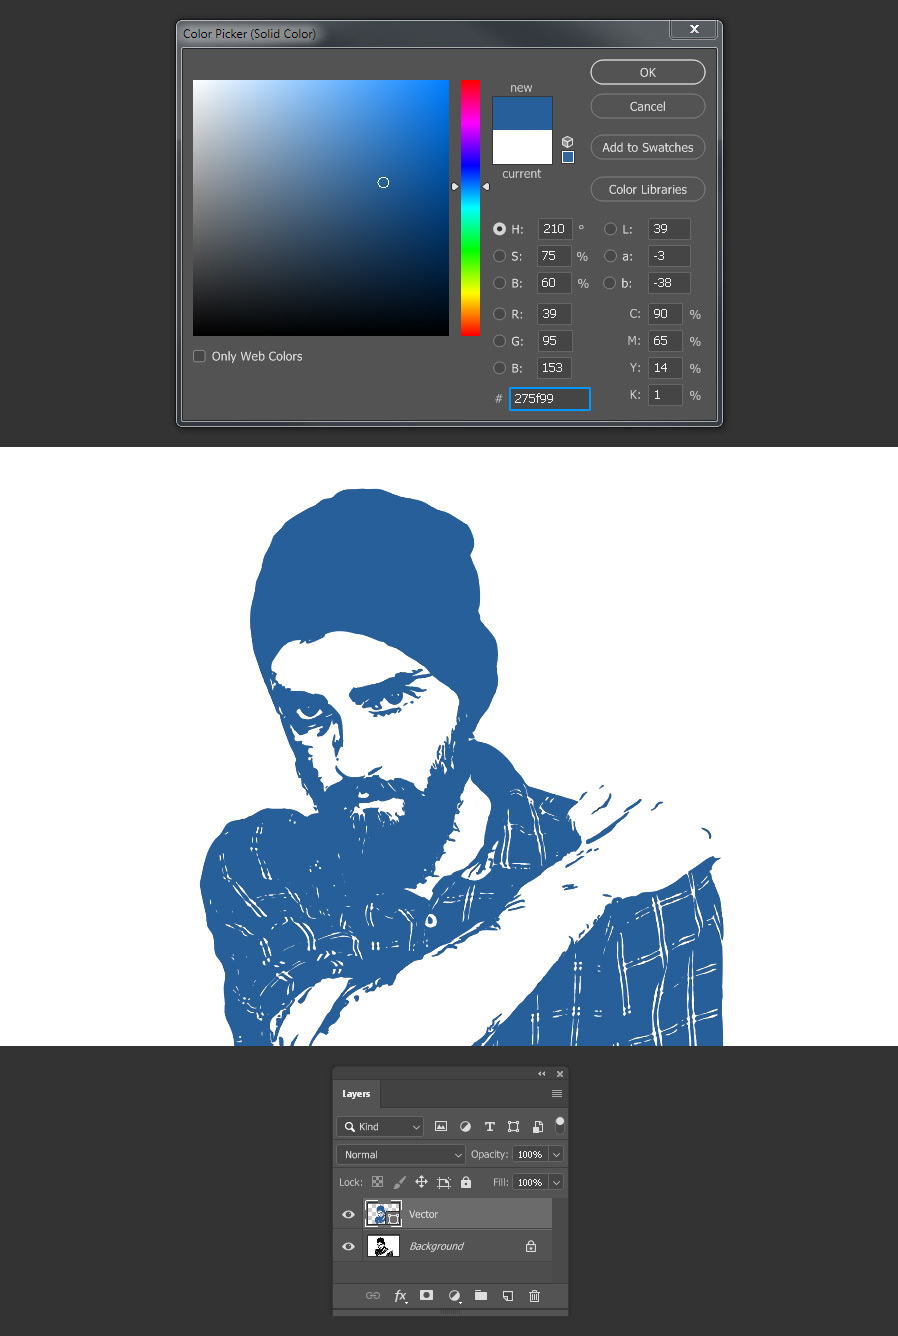
ステップ17
[カラーピッカー]ウィンドウで任意の色を選択し、[OK]をクリックします。
いくつかの最終的な注意事項
これで、ベクターを任意のサイズに拡大縮小し、カラーピッカーを使用してベクターの色を簡単に変更できます。 、新しい背景レイヤーを作成して任意の色で塗りつぶすか、背景レイヤーをオフにして透明な背景の上に配置します。